![[jQuery] 11_종합 응용 예시 & 부트스트랩(BootStrap)](https://img1.daumcdn.net/thumb/R750x0/?scode=mtistory2&fname=https%3A%2F%2Fblog.kakaocdn.net%2Fdn%2Fba96mo%2FbtrNNMAHbls%2FfnoZqKcybMc6a66bMx2unK%2Fimg.png)
jQuery 종합 응용 예시
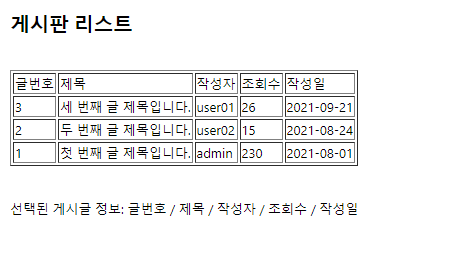 |
기본 상태 |
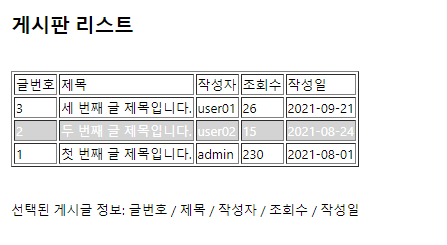 |
마우스를 올렸을 때 |
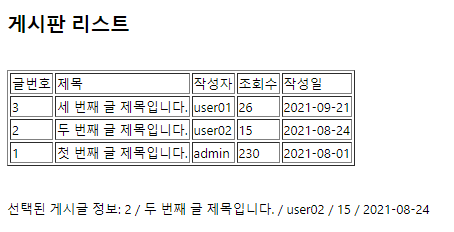 |
(두 번째) 게시글을 클릭했을 때 |
<head>
<style>
tbody>tr:hover {
cursor : pointer;
color : white;
background-color: lightgrey;
}
</style>
</head>
<body>
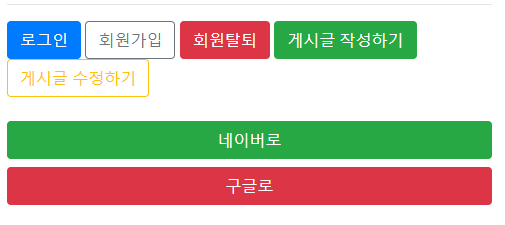
<h2>게시판 리스트</h2>
<br>
<table border="1">
<thead>
<tr>
<td>글번호</td>
<td>제목</td>
<td>작성자</td>
<td>조회수</td>
<td>작성일</td>
</tr>
</thead>
<tbody>
<!-- (tr<td*5)*3 + Enter -->
<tr>
<td>3</td>
<td>세 번째 글 제목입니다.</td>
<td>user01</td>
<td>26</td>
<td>2021-09-21</td>
</tr>
<tr>
<td>2</td>
<td>두 번째 글 제목입니다.</td>
<td>user02</td>
<td>15</td>
<td>2021-08-24</td>
</tr>
<tr>
<td>1</td>
<td>첫 번째 글 제목입니다.</td>
<td>admin</td>
<td>230</td>
<td>2021-08-01</td>
</tr>
</tbody>
</table>
<br><br>
선택된 게시글 정보:
<label id="l1">글번호</label> /
<label id="l2">제목</label> /
<label id="l3">작성자</label> /
<label id="l4">조회수</label> /
<label id="l5">작성일</label>
<script>
$(function() {
$("tbody>tr").click(function() { // tbody의 tr들 중에 클릭 이벤트가 발생한 경우
// console.log($(this)); // 이벤트 핸들러 내에서의 $(this) == 현재 이벤트를 당한 target
// console.log($(this).children()); // tr의 자식들 => 5개의 td 태그들 [td, td, td, td, td]가 순차적으로 배열에 담겨 각각의 인덱스로 찍힘
// console.log($(this).children().eq(0)); // 0번째 인덱스에 들은 글 번호를 담은 td
console.log($(this).children().eq(0).text());
// => 현재 선택된 요소의 자식들 중에서 0번째 요소 (<td>글번호</td>)의 내용물만 가지고 오겠음
/*
$("#l1").text($(this).children().eq(0).text());
$("#l1").text($(this).children().eq(1).text());
*/
// 위의 코드를 each 메소드 활용하여 반복 돌리기
// [td, td, td, td, td]가 담겨 있는 배열
$(this).children().each(function(index, el) {
// index: 순차적으로 접근할 때마다의 인덱스 수 (0 ~ 4)
// el: 순차적으로 접근되는 요소 객체 (td 태그)
// console.log($(el).text());
// 1
// 1
// 첫 번째 글 제목입니다.
// admin
// 230
// 2021-08-01
$("#l" + (index + 1)).text($(el).text());
});
// 해당 tr이 클릭되었을 때
// location.href = "boardDetailView.bo?bno=" + $(this).children().eq(0).text();
// 지금은 파일을 액세스 할 수 없다고 뜨지만 나중에 뭘 배우고 나면...... 글 수정할 수 있다고...? 뭐?
});
});
</script>
부트스트랩(BootStrap)
웹 사이트를 쉽게 꾸밀 수 있게 도와주는 HTML, CSS JS 프레임워크 (규칙성이 강한 라이브러리)
B4 -> 제이쿼리 기반으로 만들어져서 우리가 사용하기에 가장 호환성 좋음
W3shcool 접속: https://www.w3schools.com/
W3Schools Free Online Web Tutorials
W3Schools offers free online tutorials, references and exercises in all the major languages of the web. Covering popular subjects like HTML, CSS, JavaScript, Python, SQL, Java, and many, many more.
www.w3schools.com
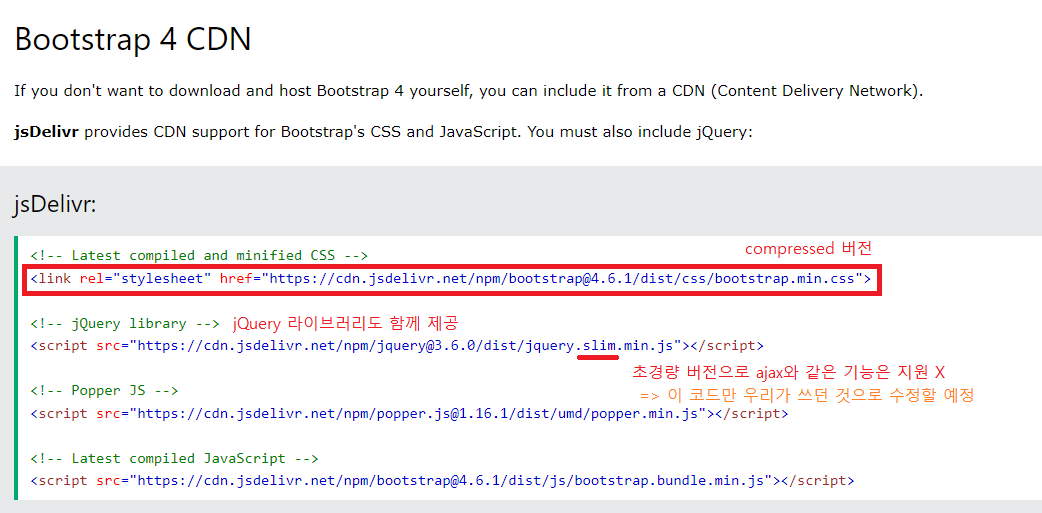
BootStrap - B4(제이쿼리와 가장 호환 잘되는 안정성 있는 버전) - BS4 Get Started 접속 후 아래 코드 복붙
(jQuery 라이브러리 연결 방법과 일치함)
<script src="https://ajax.googleapis.com/ajax/libs/jquery/3.6.1/jquery.min.js"></script> <!-- 온라인 방식 -->

    <!--
        * 부트스트랩
        웹 사이트를 쉽게 꾸밀 수 있게 도와주는 HTML, CSS JS 프레임워크 (규칙성이 강한 라이브러리)
     -->

    <!-- Latest compiled and minified CSS -->
    <link rel="stylesheet" href="https://cdn.jsdelivr.net/npm/bootstrap@4.6.1/dist/css/bootstrap.min.css">

    <!-- Popper JS -->
    <script src="https://cdn.jsdelivr.net/npm/popper.js@1.16.1/dist/umd/popper.min.js"></script>

    <!-- Latest compiled JavaScript -->
    <script src="https://cdn.jsdelivr.net/npm/bootstrap@4.6.1/dist/js/bootstrap.bundle.min.js"></script>
위 코드에서의 jQuery 라이브러리는 삭제하고 기존에 우리가 쓰던 코드로 남겨 둠
<적용법>
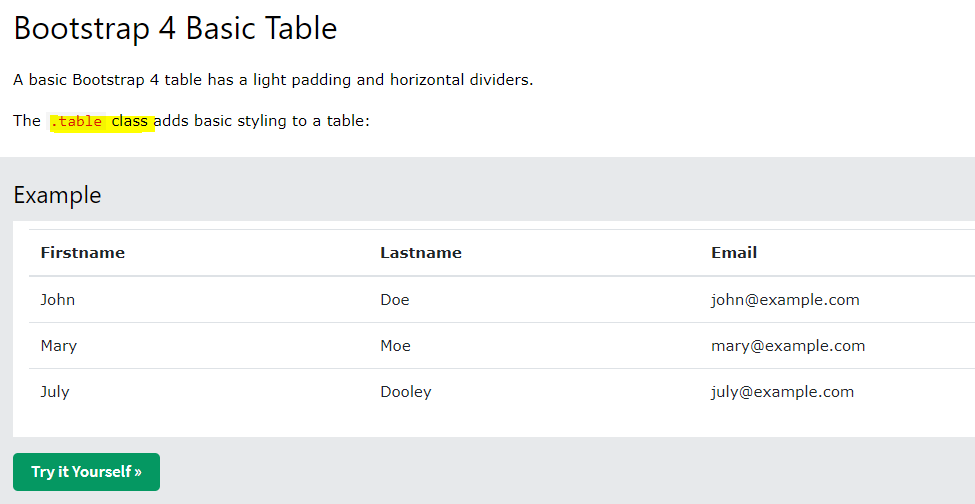
class 이름으로 table을 주면 이 테이블을 만들 수 있다고 해서
    <h2>게시판 리스트</h2>

    <br>

    <table class="table">
        <thead>
            <tr>
                <td>글번호</td>
                <td>제목</td>
                <td>작성자</td>
                <td>조회수</td>
                <td>작성일</td>
            </tr>
        </thead>
        <tbody>
            <!-- (tr<td*5)*3 + Enter -->
            <tr>
                <td>3</td>
                <td>세 번째 글 제목입니다.</td>
                <td>user01</td>
                <td>26</td>
                <td>2021-09-21</td>
            </tr>
            <tr>
                <td>2</td>
                <td>두 번째 글 제목입니다.</td>
                <td>user02</td>
                <td>15</td>
                <td>2021-08-24</td>
            </tr>
            <tr>
                <td>1</td>
                <td>첫 번째 글 제목입니다.</td>
                <td>admin</td>
                <td>230</td>
                <td>2021-08-01</td>
            </tr>
        </tbody>
    </table>
적용시켜 봤더니
ㄹㅇ 바뀌었다
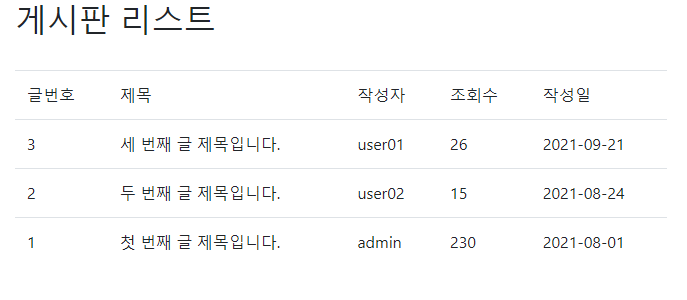
자주 쓰일 법한 부트스트랩 스타일들
1. 버튼
<!-- 자주 쓰일 법한 버튼 스타일들 (부트스트랩) -->
    <button class="btn btn-primary">로그인</button>
    <button class="btn btn-outline-secondary">회원가입</button>
    <button class="btn btn-danger">회원탈퇴</button>
    <button class="btn btn-success">게시글 작성하기</button>
    <button class="btn btn-outline-warning">게시글 수정하기</button>

        <!--
        	다른 태그에도 버튼 모양을 지정할 수 있음!
        	스타일 적용은 물론 버튼처럼 클릭 가능한 형태가 됨
            -->

    <br><br>

    <div class="btn btn-success btn-block"> 네이버로</div>
    <a class="btn btn-danger btn-block">구글로</a>
버튼이 아닌 다른 태그에도 버튼 모양을 지정할 수 있으며,
그렇게 적용하더라도 스타일 적용은 물론 버튼처럼 클릭 가능한 형태가 됨
-outline- : 기본 상태는 색이 칠해져 있지 않지만 hover 효과로 마우스를 올리면 색이 칠해짐
2. 이메일 폼
 |
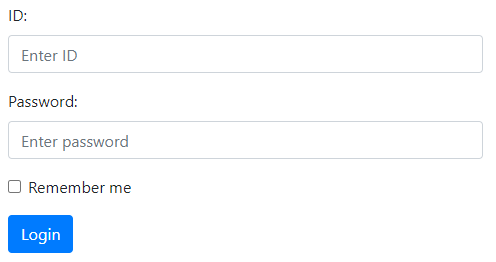 |
| 기존 폼 | 바꿔 본 로그인 폼 |
    <!-- 이메일 폼 예시를 그대로 가지고 와서 입맛대로 바꿔 봄 -->

    <form action="/action_page.php">
        <div class="form-group">
          <label for="email">ID:</label>
          <input type="email" class="form-control" placeholder="Enter ID" id="email">
        </div>
        <div class="form-group">
          <label for="pwd">Password:</label>
          <input type="password" class="form-control" placeholder="Enter password" id="pwd">
        </div>
        <div class="form-group form-check">
          <label class="form-check-label">
            <input class="form-check-input" type="checkbox"> Remember me
          </label>
        </div>
        <button type="submit" class="btn btn-primary">Login</button>
      </form>
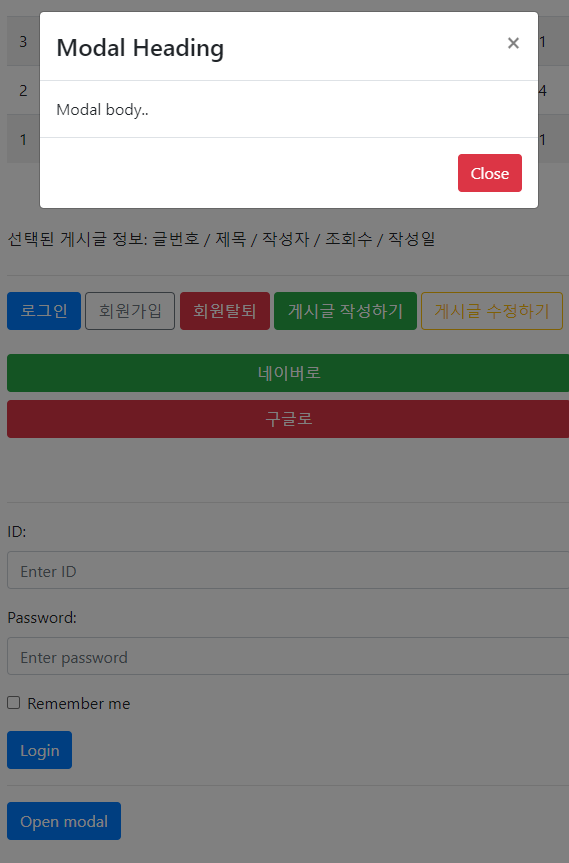
3. 모달창
 |
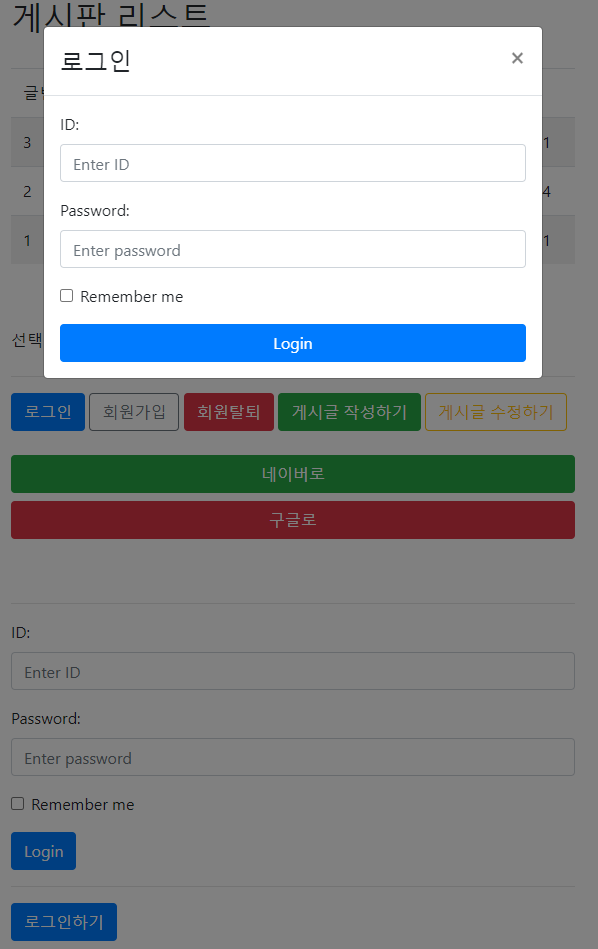 |
| 기존 모달창 | 수정 후 모달창 |
<!--
모달창 예시
: 알림창, 대화상자, 팝업창 같은 것 => div 요소로 만들어져 있음
(평소에는 숨겨져 있다가 어떤 행위 후에 나타나는 것)
얘도 부트스트랩에서 기본 모달창 그대로 복붙해 봄
-->
<!-- Button to Open the Modal -->
<button type="button" class="btn btn-primary" data-toggle="modal" data-target="#loginModal">
로그인하기
</button>
<!-- The Modal -->
<div class="modal" id="loginModal">
<div class="modal-dialog">
<div class="modal-content">
<!-- Modal Header -->
<div class="modal-header">
<h4 class="modal-title">로그인</h4>
<button type="button" class="close" data-dismiss="modal">×</button>
</div>
<!-- Modal body -->
<div class="modal-body">
<form action="/action_page.php">
<div class="form-group">
<label for="email">ID:</label>
<input type="email" class="form-control" placeholder="Enter ID" id="email">
</div>
<div class="form-group">
<label for="pwd">Password:</label>
<input type="password" class="form-control" placeholder="Enter password" id="pwd">
</div>
<div class="form-group form-check">
<label class="form-check-label">
<input class="form-check-input" type="checkbox"> Remember me
</label>
</div>
<button type="submit" class="btn btn-primary btn-block">Login</button>
</form>
</div>
<!-- Modal footer
<div class="modal-footer">
<button type="button" class="btn btn-danger" data-dismiss="modal">Close</button>
</div>
-->
</div>
</div>
</div>
부트스트랩 무료 템플릿
다운로드 후 VSCode로 열어서 원하는 부분만 수정하면 됨
(보통 기본은 index.html 파일임)