조건
1. 마우스오버 형식일 것 👉🏻 더 편하니까
2. 아름다운 UI일 것 (ㅋㅋ)
3. 0.5점 구현이 가능할 것
1. 1점 단위의 별점 구현
👉🏻 radiobox를 사용
👉🏻 이모지를 label로 붙이고 박스를 보이지 않게 없앰
👉🏻 이모지를 컬러 없애고 호버 시 색상 부여
👉🏻 이모지를 클릭 시 호버의 색상 그대로 부여하고 유지
문제점
❓ html, css 끝내 놓고 나니 value를 다시 1~5 순서로 바꿔도 잘 작용한다 뭐지?
❓ 0.5점씩 구현하고 싶었는데 이 코드로는 안 될 것 같다 이모지를 가지고 온 형태라 쪼개기 힘들 듯...
html 코드
<!-- 유저가 쓴 별점/코멘트가 없을 때 -->
<form name="myform" id="myform" method="post" action="./save">
<fieldset>
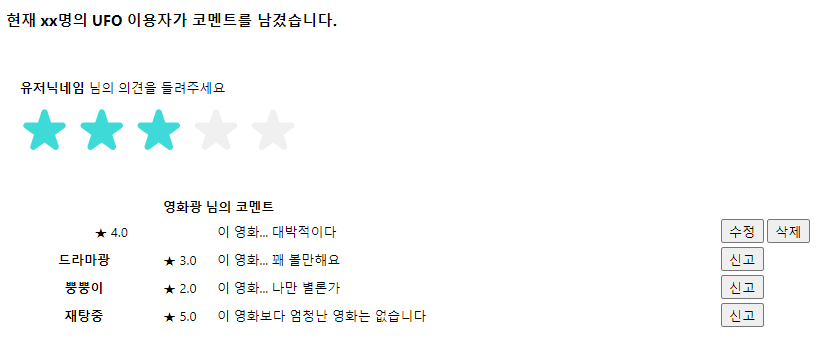
<legend><b>유저닉네임</b> 님의 의견을 들려주세요</legend>
<input type="radio" name="rating" value="5" id="rate1"><label for="rate1">⭐</label>
<input type="radio" name="rating" value="4" id="rate2"><label for="rate2">⭐</label>
<input type="radio" name="rating" value="3" id="rate3"><label for="rate3">⭐</label>
<input type="radio" name="rating" value="2" id="rate4"><label for="rate4">⭐</label>
<input type="radio" name="rating" value="1" id="rate5"><label for="rate5">⭐</label>
</fieldset>
</form>
css 코드
👉🏻 포인트 색을 우리 웹 사이트의 색인 민트로 바꿔 보았다... 제법 귀엽다
/* 별점 css */
#myform fieldset{
    display: inline-block; /* 하위 별점 이미지들이 있는 영역만 자리를 차지함.*/
    border: 0; /* 필드셋 테두리 제거 */
}
#myform input[type=radio]{
    display: none; /* 라디오박스 감춤 */
}
#myform label{
    font-size: 3em; /* 이모지 크기 */
    color: transparent; /* 기존 이모지 컬러 제거 */
    text-shadow: 0 0 0 #f0f0f0; /* 새 이모지 색상 부여 */
}

#myform label:hover{
    text-shadow: 0 0 0 #3edad8; /* 마우스 호버 */
}
#myform label:hover ~ label{
    text-shadow: 0 0 0 #3edad8; /* 마우스 호버 뒤에오는 이모지들 */
}

#myform fieldset{
    display: inline-block; /* 하위 별점 이미지들이 있는 영역만 자리를 차지함.*/
    direction: rtl; /* 이모지 순서 반전 */
    border: 0; /* 필드셋 테두리 제거 */
}

#myform fieldset legend{
    text-align: left;
}

#myform input[type=radio]:checked ~ label{
    text-shadow: 0 0 0 #3edad8; /* 마우스 클릭 체크 */
}
2. 0.5점 단위의 별점 구현

👉🏻 radiobox를 사용
👉🏻 이모지를 label로 붙이고 박스를 보이지 않게 없앰
👉🏻 이모지를 컬러 없애고 호버 시 색상 부여
👉🏻 이모지를 클릭 시 호버의 색상 그대로 부여하고 유지
구조 자체는 1번 방법과 같으나 이모지가 아닌 png를 가지고 옴으로써 %별로 색을 채우는 느낌인 듯함
문제점
❓ 내가 배우지 않은 css 코드를 사용한다 낯설다... 수정 요청이 들어왔을 때 원하는 대로 건드릴 수 있을지 잘 모르겠다
❓ 아직 시간이 있으니 내가 더 잘 접근(?)할 수 있는 코드를 찾아봐야지...
html 코드
    <!-- 유저가 쓴 별점/코멘트가 없을 때: 별점 0.5 ver. -->
    <div class="starpoint_wrap">
        <div class="starpoint_box">
          <label for="starpoint_1" class="label_star" title="0.5"><span class="blind">0.5점</span></label>
          <label for="starpoint_2" class="label_star" title="1"><span class="blind">1점</span></label>
          <label for="starpoint_3" class="label_star" title="1.5"><span class="blind">1.5점</span></label>
          <label for="starpoint_4" class="label_star" title="2"><span class="blind">2점</span></label>
          <label for="starpoint_5" class="label_star" title="2.5"><span class="blind">2.5점</span></label>
          <label for="starpoint_6" class="label_star" title="3"><span class="blind">3점</span></label>
          <label for="starpoint_7" class="label_star" title="3.5"><span class="blind">3.5점</span></label>
          <label for="starpoint_8" class="label_star" title="4"><span class="blind">4점</span></label>
          <label for="starpoint_9" class="label_star" title="4.5"><span class="blind">4.5점</span></label>
          <label for="starpoint_10" class="label_star" title="5"><span class="blind">5점</span></label>
          <input type="radio" name="starpoint" id="starpoint_1" class="star_radio">
          <input type="radio" name="starpoint" id="starpoint_2" class="star_radio">
          <input type="radio" name="starpoint" id="starpoint_3" class="star_radio">
          <input type="radio" name="starpoint" id="starpoint_4" class="star_radio">
          <input type="radio" name="starpoint" id="starpoint_5" class="star_radio">
          <input type="radio" name="starpoint" id="starpoint_6" class="star_radio">
          <input type="radio" name="starpoint" id="starpoint_7" class="star_radio">
          <input type="radio" name="starpoint" id="starpoint_8" class="star_radio">
          <input type="radio" name="starpoint" id="starpoint_9" class="star_radio">
          <input type="radio" name="starpoint" id="starpoint_10" class="star_radio">
          <span class="starpoint_bg"></span>
        </div>
      </div>
css 코드
/* 별점 css (0.5점) */
.starpoint_wrap {
    display:inline-block;
}

.starpoint_box {
    position:relative;
    background:url(https://ido-archive.github.io/svc/etc/element/img/sp_star.png) 0 0 no-repeat;
    font-size:0;}
.starpoint_box .starpoint_bg {
    display:block;
    position:absolute;
    top:0;
    left:0;
    height:18px;
    background:url(https://ido-archive.github.io/svc/etc/element/img/sp_star.png) 0 -20px no-repeat;
    pointer-events:none;
}
.starpoint_box .label_star {
    display:inline-block;
    width:10px;
    height:18px;
    box-sizing:border-box;
}
.starpoint_box .star_radio {
    opacity:0;
    width:0;
    height:0;
    position:absolute;
}
.starpoint_box .star_radio:nth-of-type(1):hover ~ .starpoint_bg,
.starpoint_box .star_radio:nth-of-type(1):checked ~ .starpoint_bg{width:10%;}
.starpoint_box .star_radio:nth-of-type(2):hover ~ .starpoint_bg,
.starpoint_box .star_radio:nth-of-type(2):checked ~ .starpoint_bg{width:20%;}
.starpoint_box .star_radio:nth-of-type(3):hover ~ .starpoint_bg,
.starpoint_box .star_radio:nth-of-type(3):checked ~ .starpoint_bg{width:30%;}
.starpoint_box .star_radio:nth-of-type(4):hover ~ .starpoint_bg,
.starpoint_box .star_radio:nth-of-type(4):checked ~ .starpoint_bg{width:40%;}
.starpoint_box .star_radio:nth-of-type(5):hover ~ .starpoint_bg,
.starpoint_box .star_radio:nth-of-type(5):checked ~ .starpoint_bg{width:50%;}
.starpoint_box .star_radio:nth-of-type(6):hover ~ .starpoint_bg,
.starpoint_box .star_radio:nth-of-type(6):checked ~ .starpoint_bg{width:60%;}
.starpoint_box .star_radio:nth-of-type(7):hover ~ .starpoint_bg,
.starpoint_box .star_radio:nth-of-type(7):checked ~ .starpoint_bg{width:70%;}
.starpoint_box .star_radio:nth-of-type(8):hover ~ .starpoint_bg,
.starpoint_box .star_radio:nth-of-type(8):checked ~ .starpoint_bg{width:80%;}
.starpoint_box .star_radio:nth-of-type(9):hover ~ .starpoint_bg,
.starpoint_box .star_radio:nth-of-type(9):checked ~ .starpoint_bg{width:90%;}
.starpoint_box .star_radio:nth-of-type(10):hover ~ .starpoint_bg,
.starpoint_box .star_radio:nth-of-type(10):checked ~ .starpoint_bg{width:100%;}

.blind{
    position : absolute;
    clip : rect(0 0 0 0);
    margin : -1px;
    width : 1px;
    height : 1px;
    overflow :hidden;
}
3. 0.5점 별점
👉🏻 올린 사람의 별이 없어졌다
👉🏻 코드 해석 중...
👉🏻 별 하나를 왼쪽/오른쪽 나눠서 주기
문제점
❓ png는 기존 1의 방법처럼 색을 제거할 수가 없음(color: transparent; /* 기존 이모지 컬러 제거 */) => 브랜드 포인트색을 못 살림
HTML코드
<div class="star-box">
        <span class="star star_left"></span>
        <span class="star star_right"></span>

        <span class="star star_left"></span>
        <span class="star star_right"></span>

        <span class="star star_left"></span>
        <span class="star star_right"></span>

       <span class="star star_left"></span>
       <span class="star star_right"></span>

       <span class="star star_left"></span>
       <span class="star star_right"></span>
      </div>


      <!-- 별이 클릭되면 on 클래스를 없애라 i가 0에서  -->
      <script>
            $(".star").on('click',function(){

                // console.log($(".star"));
                // console.log($(this));

                var idx = $(this).index();
                $(".star").removeClass("on");
                    for(var i=0; i<=idx; i++){
                        $(".star").eq(i).addClass("on");
                }
            });
      </script>
js코드
      <script>
            $(".star").on('click',function(){
                var idx = $(this).index();
                $(".star").removeClass("on");
                    for(var i=0; i<=idx; i++){
                        $(".star").eq(i).addClass("on");
                }
            });
      </script>
// 클릭한 요소의 형제들 중 자신이 몇 번째인지 확인
$(this).index();
script 해석
👉🏻 별이 클릭되면 모든 on 클래스를 없애라
👉🏻 i가 0에서 클릭한 별까지만 on 클래스를 추가해라
on 클래스 👉🏻 클릭된 별에 줄 속성
css 코드
테스트
👉🏻 https://cdn-icons-png.flaticon.com/512/2107/2107957.png 노란별
👉🏻 https://cdn-icons-png.flaticon.com/512/3303/3303088.png 까망별
*{margin:0; padding:0;}
.star{
  display:inline-block;
  width: 30px;
  height: 60px;
  cursor: pointer;
}
.star_left{
  background: url(https://cdn-icons-png.flaticon.com/512/3303/3303088.png) no-repeat 0 0;
  background-size: 60px;
  margin-right: -3px;
}
.star_right{
  background: url(https://cdn-icons-png.flaticon.com/512/3303/3303088.png) no-repeat -30px 0;
  background-size: 60px;
  margin-left: -3px;
}
.star.on{
  background-image: url();
}
4. 0.5점 별점 구현
👉🏻 input type="range"
👉🏻 텍스트 별 ★과 합쳐서 클릭 및 드래그로 구현
html코드
<span class="star">
  ★★★★★
  <span>★★★★★</span>
  <input type="range" oninput="drawStar(this)" value="1" step="1" min="0" max="10">
</span>
css코드
.star {
    position: relative;
    font-size: 2rem;
    color: #ddd;
  }

  .star input {
    width: 100%;
    height: 100%;
    position: absolute;
    left: 0;
    opacity: 0;
    cursor: pointer;
  }

  .star span {
    width: 0;
    position: absolute;
    left: 0;
    color: #3edad8;
    overflow: hidden;
    pointer-events: none;
  }
js코드
익명 함수를 화살표 함수로도 쓸 수 있음
const drawStar = (target) => { }
👉🏻 const drawStar = function (target) { } 와 같음
JavaScript es6 문법 - 백틱 사용법
var bar = 'a';
console.log('bar는' + bar + "입니다.")
👉🏻 console.log(`bar는 ${bar} 입니다`) 와 같음
<script>
         const drawStar = function (target) {
        document.querySelector(`.star span`).style.width = `${target.value * 10}%`;
    }
    </script>
<script>
// const drawStar = (target) => { // 얘는
const drawStar = function (target) { // 얘와 같고
// document.querySelector(`.star span`).style.width = `${target.value * 10}%`; // 얘는
$(".star span").css({ width: `${target.value * 10}%` }); // 얘와 같다
}
</script>